In this post we will discuss about Microsoft Dynamics 365 – Business Central 2019 Wave 2 Cloud ( SAAS ) Multiple Production Environment creation and maintenance.
Before Business Central wave 2 edition release (October 2019) there were no feature was exist to create multiple Production Instance creation against the single cloud account. However earlier it was possible to create Sandbox Interface multiple instances against the production. If you want more details on this feel free to contact. Now let’s come back to our agenda of the day.
Table of Contents
How to create Multiple Business Central Production Environment in Cloud or SAAS Interface?
For creating production interface on Cloud solution is little bit differ after the Business Central wave 2 2019 edition release occurred in October 2019.
Following are step by instruction to create the Production Interface on Business Central Solution.
Pre-requisite
For doing the below steps you should have valid Business Central Cloud login account available.
Step 1: Open the Business Central Admin Central
Open the Business Central Cloud Admin Central ( Business Central Admin Central ) in browser. If you don’t know how to access the Admin Central , then please note this can be access by entering in “Admin” end of the cloud url you are having.
Step 2: Open Environment section
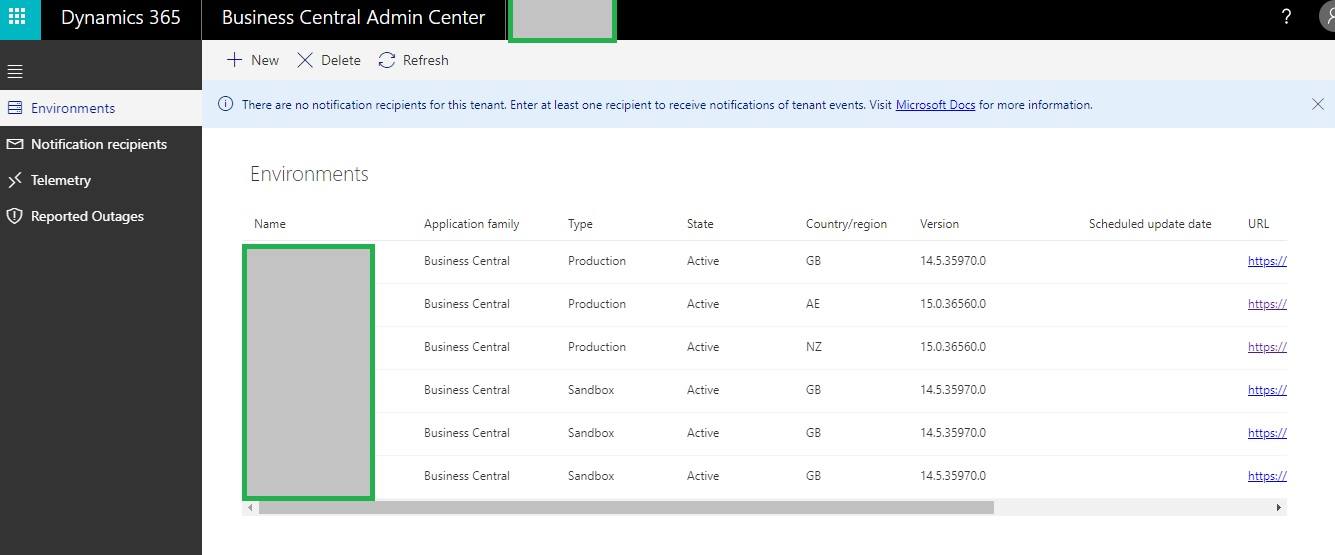
Click on “Environments” menu listed left side of the page.
Once you have clicked on this link then all the existing ” Environments” exists with your account. Where Environments are nothing but difference instances of Cloud / Sanbox.
Step 3: Step by Step Instructions
Now click on “New” button just like mentioned the following image, to open one requisition form to start filling the parameters required for new interface.
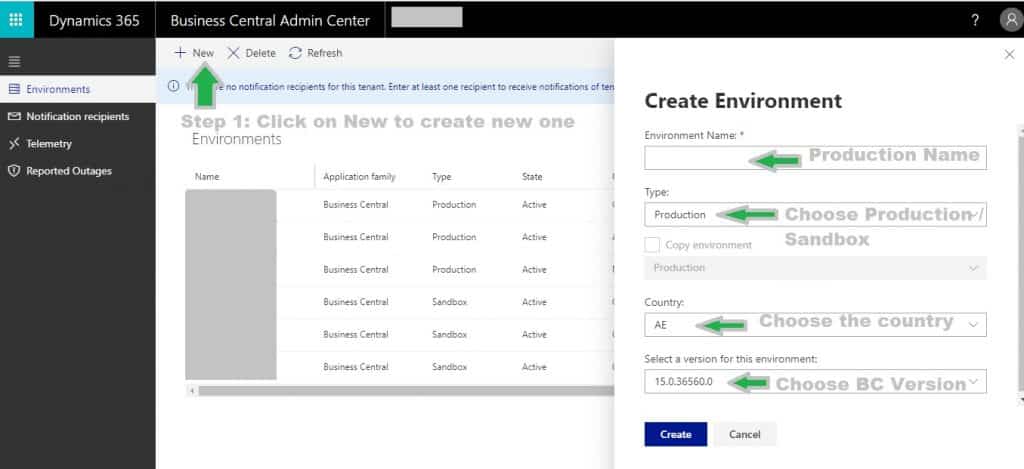
After you have clicked on “New” button needs to fill the required details on “Create Environment” window like follows.
- Environment Name : this the new Cloud Instance Name also known as Production Name if you have choose Type as Production.
- Type: Production / Sandbox ( Choose Production for creating new Production Interface)
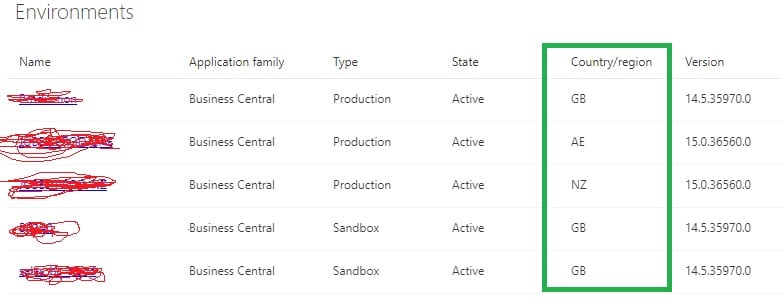
- Country : Select the new Production Country code. Carefully choose this option as all the db creation happens based upon country code. This is the new option introduced with Business Central October 2019 release.
- Select Version for this Environment: under this option choose the right Business Central Version you wish to create.
Step 4: Press Create button to Finalize
Press “Create” button to create new Production interface on Business Central. That’s it.
If you want to create new Production interface again then please repeat step 1 and Step 4 .
How to open Specific Country Environment when opening url over Browser?
When you have created multiple Country specific Production environment then system will popup a message similar to following image to choose.
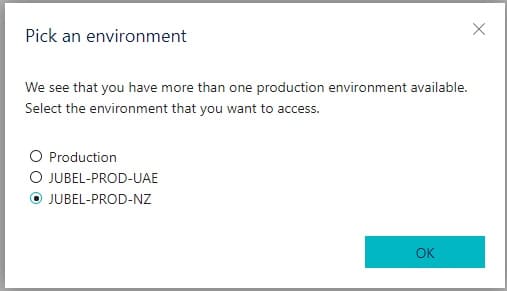
Once you choose the specific environment it will open the working interface in Business Central Web Client.
Hope this post useful to you.
