
Sometimes things do not go as planned – customers might return products due to wrong items, damages, or simply because they have changed their minds. As a Business Central user, you do not need to panic. Microsoft Dynamics 365 Business Central has a smooth process to handle Sales Return Orders, making sure your inventory and finances stay accurate.
In this post, I will walk you through the entire process of creating and posting a Sales Return Order in simple, beginner friendly steps.
Table of Contents
What is a Sales Return Order?
A Sales Return Order is a document in Business Central that records when a customer sends back items. It ensures:
- Inventory gets updated in ledgers of Business Central to show correct inventory in system.
- Customer accounts are adjusted.
- Financial postings stay correct.
Think of it as the reverse process of a sales order.
Steps to Create and Post a Sales Return Order
Step 1: Open Sales Return Orders
In the search bar, type Sales Return Orders.
Select the option from the list.
Tip: You may try Business Central Keyboard shortcuts for faster navigation.
You’ll land on the list page showing existing return orders.
Step 2: Create a New Sales Return Order
Click + New , to create the new Sales Return Order

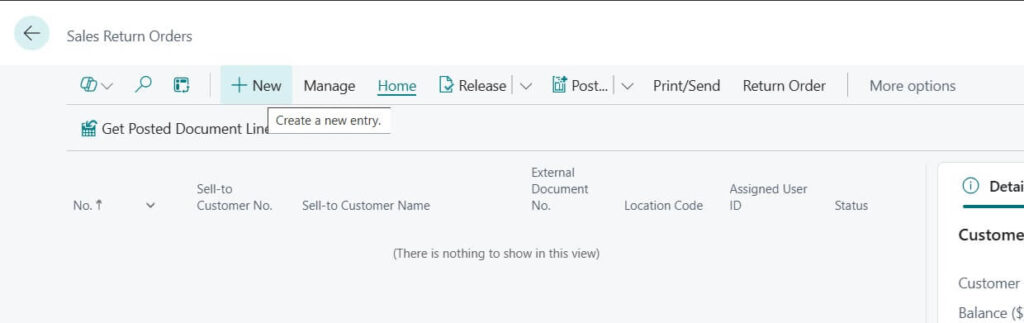
In the header, fill in:
- Customer Name / No. (the customer returning items)
- Posting Date
- Document Date
- Location Code (where the items will be returned).
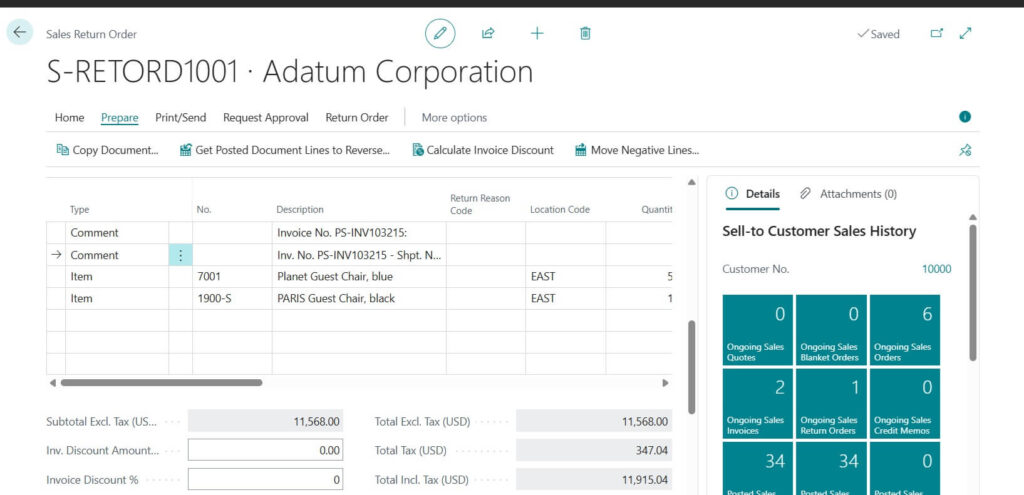
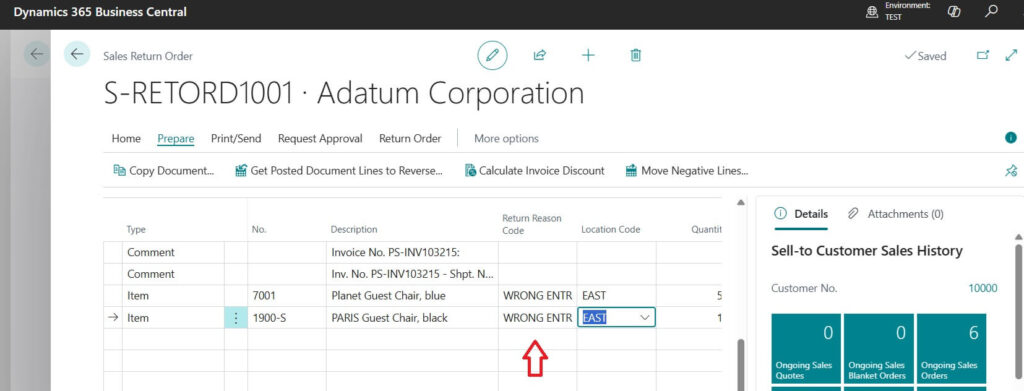
Step 3: Add Return Lines
Go to the Lines section.
Enter details like:
- Item No. (i.e, the product being returned)
- Quantity
- Unit Price (system may pull this automatically)
- Return Reason Code (e.g., damaged, incorrect, etc.).
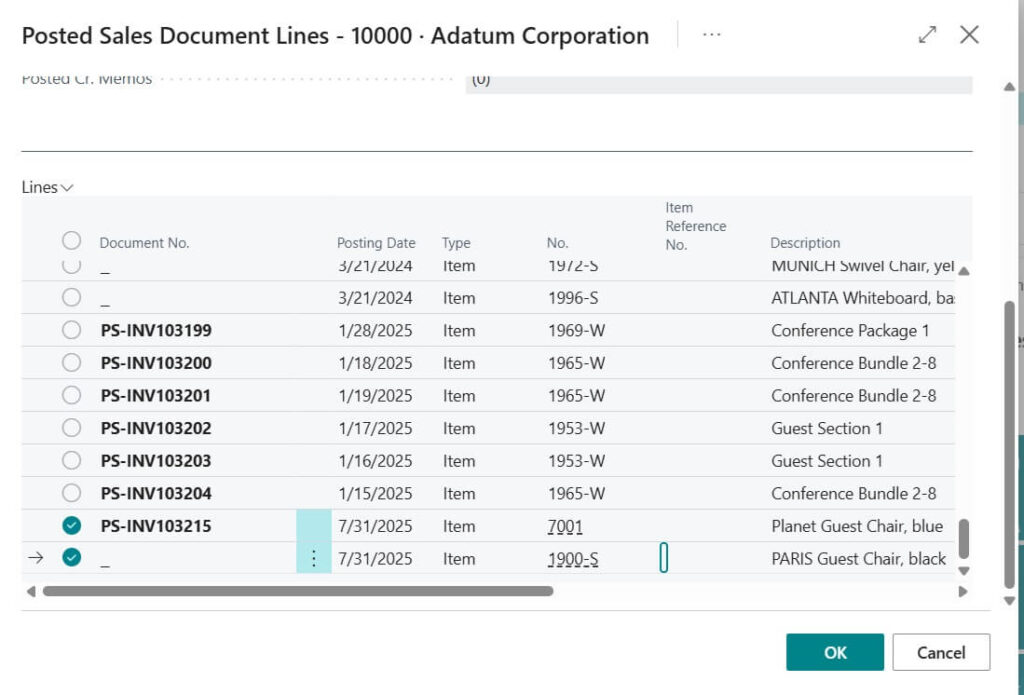
Pro Tip: If the return is against a sales order / invoice, use the Get Posted Document Lines to Reverse option. This way, you don’t have to type everything manually.


Upon clicking on “get Posted Document Lines to Reverse” in Business Central system, will get following image like interface.

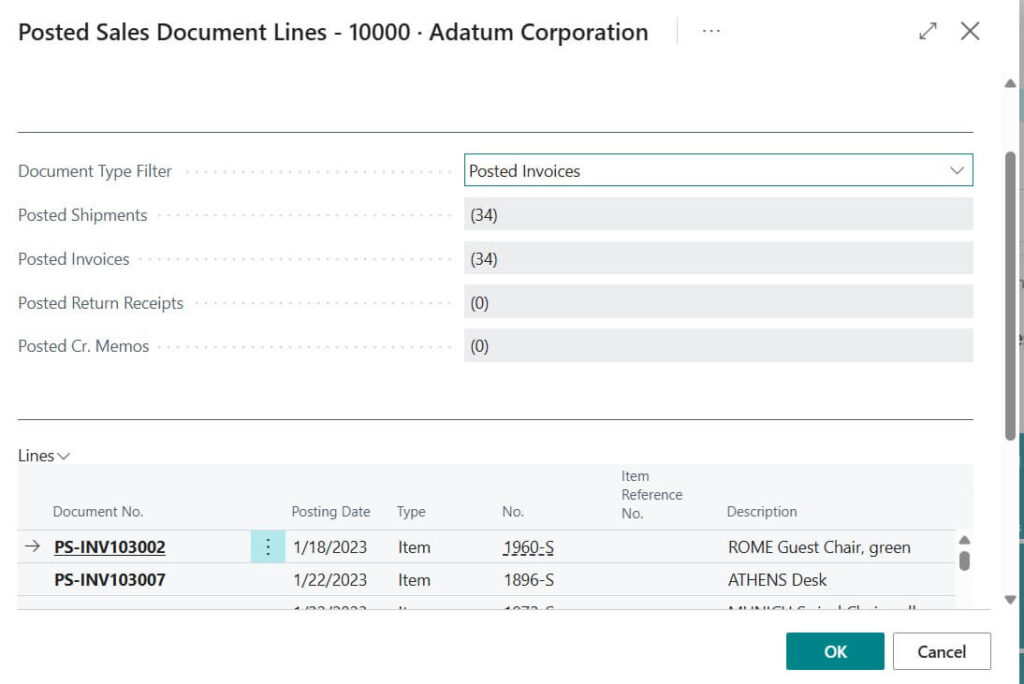
Show Reversible Lines Only
This option lets you see only the items that can still be reversed.
Example: If a sales invoice was for 20 items and 15 were already returned, then only 5 items will show as available for reversal.
Return Original Quantity : This setting determines whether the original quantity is used to receive items linked to specific shipments. For example, if a posted sales invoice has an original quantity of 20, you can match all 20 items directly with a particular shipment.


Step 4: Check and Verify
Before posting, always double-check:
- Quantities are correct.
- Make sure Return reason is selected from the list available.
- Customer and item details are accurate.

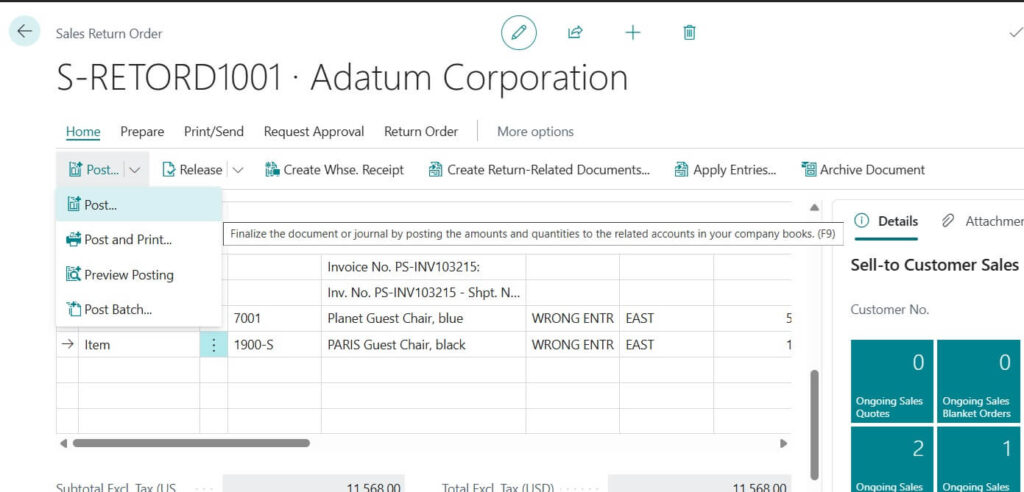
Step 5: Post the Return Order
Go to Posting > Post.
Business Central asks you whether you want to post only or post and print.
- Post only (update records but no shipment/credit memo).
- Post and Print (generate a Credit Memo).
Usually, you will choose Post and Print, so the customer gets a Credit Memo copy.


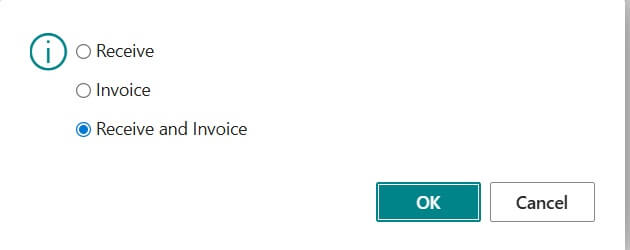
Select “Receive and Invoice” process the document,

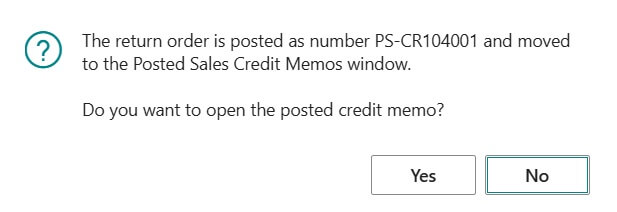
What Happens After Posting Sales Return Order ?
Once Sales Return Order posted following changes will happened in system.
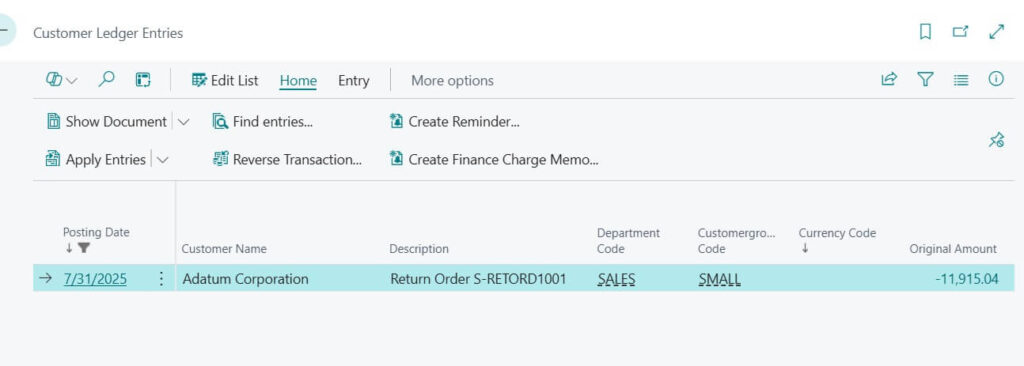
- Posting reduces the customer’s balance.
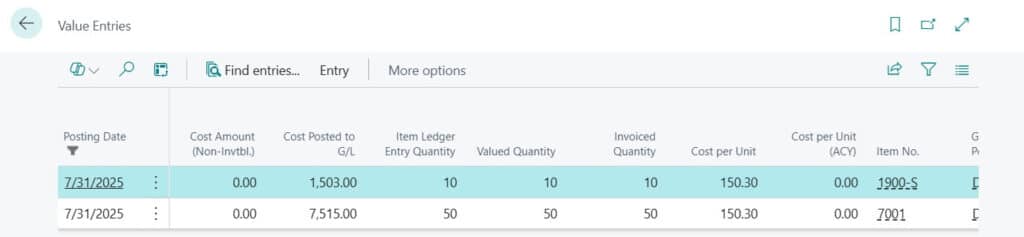
- When you return items, Business Central increases your inventory.
- Business Central automatically generates a Credit Memo.

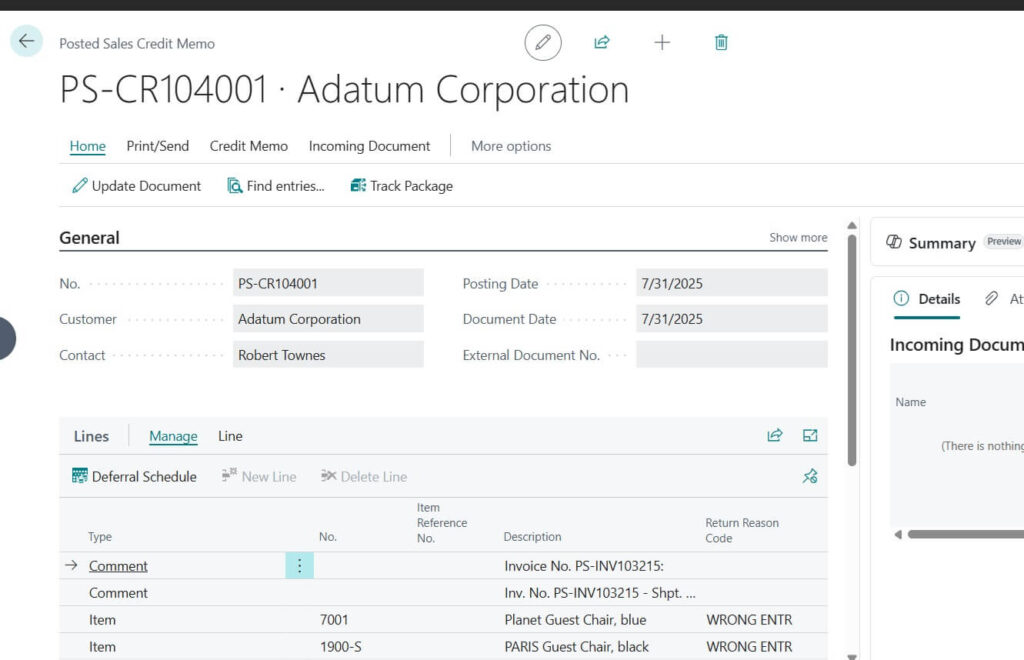
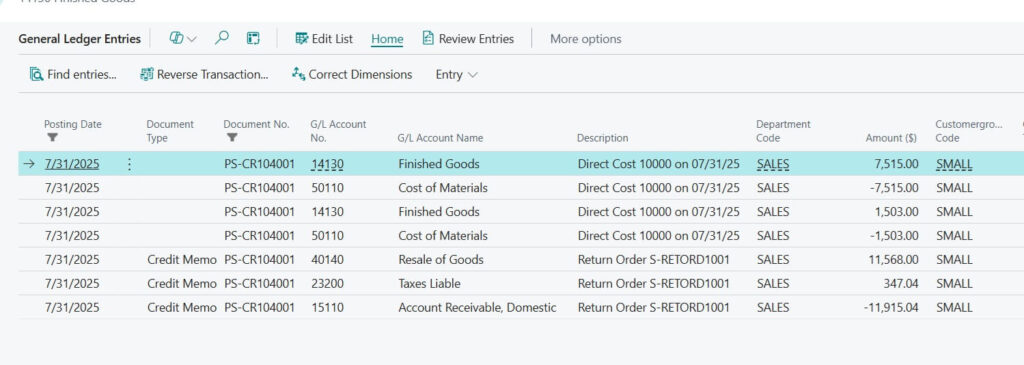
Following ledger level changes updated along with posted Credit Memo.


Key Takeaways
Following are the key take aways here
- Sales Return Orders help keep records clear and professional.
- Always verify customer and item details before posting.
- Use the Get Posted Document Lines to Reverse function on the Sales Return Order page to save time.
FAQs
Yes, but Sales Return Orders are better for tracking and linking returns with the original invoice.
Absolutely. Just select only the items / quantities being returned.
You can use a Return Reason Code to record this for future analysis.
Posting a Sales Return Order in Business Central is straightforward once you know the steps. It not only keeps your system accurate but also helps build trust with customers by processing their returns smoothly.
Next time a customer calls for a return, you’ll be ready to handle it confidently in just a few clicks!
Stay connected with NavisionPlanet for more simple, step by step functional guides on the Business Central Sales Module.


 + Free Mock Exam")