

As per repeated requests, I am creating this content dedicated to those who are waiting for a simple guide to create API integration with Microsoft Dynamics 365 Business Central. This content suitable for Beginners or non coders who want to build a simple Business Central (BC) extension that works with APIs.
What You will learn : Topics Covered
- How to set up your PC for AL development.
- How to create a very small extension.
- Example A (Consume API): Call a public REST API from Business Central and show the result on a page.
- Example B (Expose API): Create your own Custom API Page so external apps can read BC data.
- How to package, publish, and fix common errors.
Table of Contents
Prerequisites (Once only)
Make sure you have all Prerequisites mentioned below
- A Business Central Sandbox (SaaS) with a user account that can develop or publish extensions.
- Visual Studio Code (VS Code) installed.
- AL Language extension for VS Code (from the VS Code marketplace).
- Optional: Postman (for testing APIs).
Tip: If your company uses the Online (SaaS) version, your admin can give you a sandbox and permissions. If you are on‑prem, steps are very similar.
Create a New AL Project
Following are the steps to create new AL project on Business Central
- Open VS Code.
- Press Ctrl+Shift+P (Command Palette) -> type AL: Go! and press Enter.
- Choose Your target (Cloud/Sandbox).
- Pick a folder. VS Code creates a starter project with files like app.json, launch.json, and a sample HelloWorld.al.
- Press Ctrl+Shift+P -> AL: Download Symbols (this connects to your BC sandbox to pull system libraries). You’ll be asked to sign in.
Note: Keep the default settings in app.json and launch.json created by AL:Go!. We will only add files.
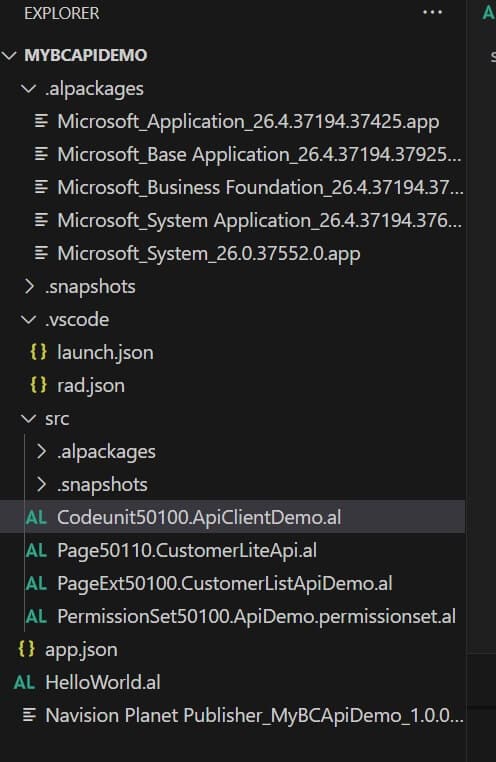
Project Structure (What you will have)
MyBCApiDemo/
  .vscode/
    launch.json
  app.json
  HelloWorld.al (auto-created; you can keep or delete)
  src/
    Codeunit50100.ApiClientDemo.al
    PageExt50100.CustomerListApiDemo.al
    Page50110.CustomerLiteApi.al
    PermissionSet50100.ApiDemo.permissionset.al
Create the src folder if it’s missing. Put all new .al files inside src.

Example A – Consume a REST API from BC (no auth)
We will call a public API (no login needed) and show the result in a message box.
Add the Codeunit (the logic)
Create a file `Codeunit50100.ApiClientDemo.al` with this content:
codeunit 50100 "API Client Demo"
{
    // Simple demo: GET and POST using HttpClient

    procedure GetSampleTodo(): Text
    var
        Client: HttpClient;
        Response: HttpResponseMessage;
        BodyText: Text;
        JObj: JsonObject;
        JTok: JsonToken;
        Title: Text;
        Id: Integer;
        Completed: Boolean;
    begin
        if not Client.Get('https://jsonplaceholder.typicode.com/todos/1', Response) then
            error('Request failed.');

        if not Response.IsSuccessStatusCode() then
            error('HTTP error %1 %2', Response.HttpStatusCode(), Response.ReasonPhrase());

        Response.Content().ReadAs(BodyText);
        JObj.ReadFrom(BodyText);

        JObj.Get('id', JTok);
        Id := JTok.AsValue().AsInteger();

        JObj.Get('title', JTok);
        Title := JTok.AsValue().AsText();

        JObj.Get('completed', JTok);
        Completed := JTok.AsValue().AsBoolean();

        exit(StrSubstNo('Todo %1: %2 (Completed: %3)', Id, Title, Format(Completed)));
    end;

    procedure PostEchoSample(): Text
    var
        Client: HttpClient;
        Request: HttpRequestMessage;
        Response: HttpResponseMessage;
        Content: HttpContent;
        Headers: HttpHeaders;
        Result: Text;
    begin
        // Define JSON body
        Content.WriteFrom('{"message": "Hello from Business Central"}');
        Content.GetHeaders(Headers);
        Headers.Clear();
        Headers.Add('Content-Type', 'application/json');

        // Build request
        Request.Method := 'POST';
        Request.SetRequestUri('https://postman-echo.com/post');
        Request.Content := Content;

        // Send request
        if Client.Send(Request, Response) then begin
            Response.Content.ReadAs(Result);
            exit(Result);
        end else
            exit('Error: No response received.');
    end;
}
Add a Page Extension (buttons to test)
Create a file `PageExt50100.CustomerListApiDemo.al` with this content:
pageextension 50100 "Customer List API Demo" extends "Customer List"
{
    actions
    {
        addlast(Processing)
        {
            action(GetTodo)
            {
                ApplicationArea = All;
                Caption = 'Get Sample To‑Do';
                Image = Information;
                trigger OnAction()
                var
                    ClientDemo: Codeunit "API Client Demo";
                    Msg: Text;
                begin
                    Msg := ClientDemo.GetSampleTodo();
                    Message(Msg);
                end;
            }
            action(PostEcho)
            {
                ApplicationArea = All;
                Caption = 'Send Echo POST';
                Image = Send;
                trigger OnAction()
                var
                    ClientDemo: Codeunit "API Client Demo";
                    Msg: Text;
                begin
                    Msg := ClientDemo.PostEchoSample();
                    Message(Msg);
                end;
            }
        }
    }
}
Run and Test
- Press F5 (or Ctrl+F5) to publish the extension to the sandbox and open BC.
- Go to Customers (Customer List page).
- Click Actions -> Get Sample To‑Do. You should see a message like “Todo 1: delectus aut autem (Completed: No)”

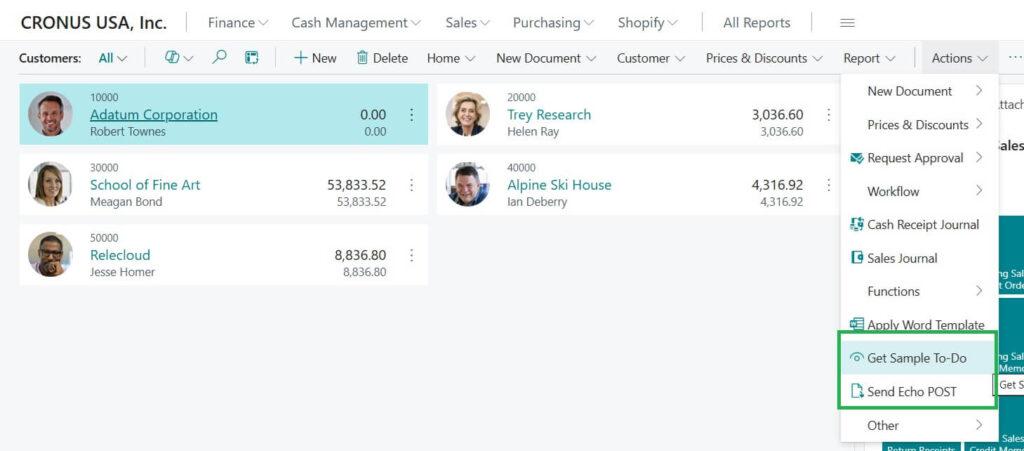

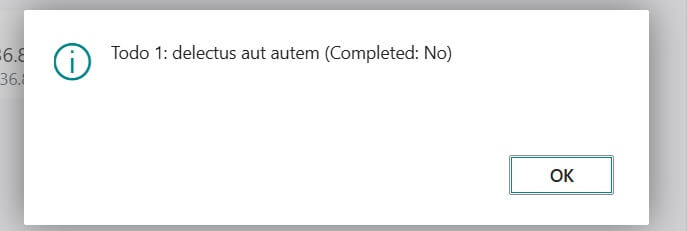
Fig: Get Sample To-Do result
- Click Send Echo POST. You will see a JSON snippet from the echo server.
Success! You have called external APIs from BC using a button.

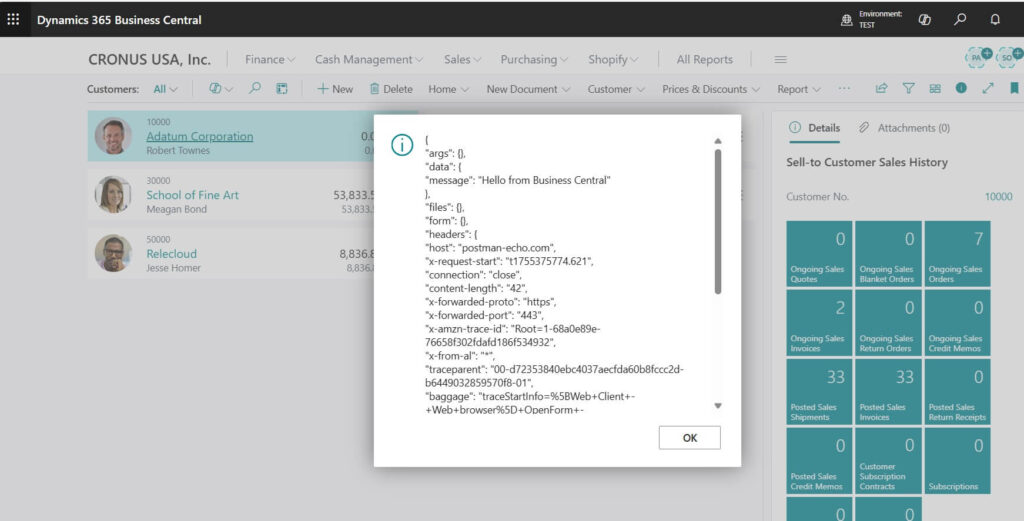
Fig: Send Echo POST result
{
"args": {},
"data": {
"message": "Hello from Business Central"
},
"files": {},
"form": {},
"headers": {
"host": "postman-echo.com",
"x-request-start": "t1755375774.621",
"connection": "close",
"content-length": "42",
"x-forwarded-proto": "https",
"x-forwarded-port": "443",
"x-amzn-trace-id": "Root=1-68a0e89e-76658f302fdafd186f534932",
"x-from-al": "*",
"traceparent": "00-d72353840ebc4037aecfda60b8fccc2d-b6449032859570f8-01",
"baggage": "traceStartInfo=%5BWeb+Client+-+Web+browser%5D+OpenForm+-+Opening+page+with+id+%2722%27",
"correlation-context": "traceStartInfo=%5BWeb+Client+-+Web+browser%5D+InvokeAction+-+The+user+clicked+on+%27PostEcho%27+on+%27Customer+List%27, clientInteractionName=InvokeAction, clientInteractionFriendlyDescription=The+user+clicked+on+%27PostEcho%27+on+%27Customer+List%27",
"content-type": "application/json"
},
"json": {
"message": "Hello from Business Central"
},
"url": "https://postman-echo.com/post"
}
Example B – Expose Your Own API (Custom API Page)
We will create a PageType = API page to expose limited customer data for external systems.
Create a file `Page50110.CustomerLiteApi.al` with this content:
page 50110 "Customer Lite API"
{
    PageType = API;
    SourceTable = Customer;
    APIPublisher = 'navplanet';
    APIGroup = 'tutorial';
    APIVersion = 'v1.0';
    EntityName = 'customerLite';
    EntitySetName = 'customerLites';
    ODataKeyFields = SystemId; // Required for custom APIs
    Caption = 'Customer Lite API';

    layout
    {
        area(Content)
        {
            repeater(General)
            {
                field(systemId; Rec.SystemId)      { Caption = 'System Id'; }
                field(no; Rec."No.")               { Caption = 'No'; }
                field(displayName; Rec.Name)       { Caption = 'Name'; }
                field(city; Rec.City)              { Caption = 'City'; }
                field(phone; Rec."Phone No.")      { Caption = 'Phone'; }
            }
        }
    }
}
Why API Page? External apps can now call a clean endpoint and get just the fields you allow.
(Optional but Good) Add a Permission Set
Create a file `PermissionSet50100.ApiDemo.permissionset.al` with this content:
permissionset 50100 APIDemo
{
    Assignable = true;
    Caption = 'API Demo - Basic';
    Permissions =
        tabledata Customer = r,
        page "Customer List" = X,
        codeunit "API Client Demo" = X,
        page "Customer Lite API" = X;
}
Assign this permission set to a user (or use standard D365 permission sets that already allow API access).
How to Call Your API (High level)
Business Central SaaS uses Microsoft Entra ID (Azure AD) OAuth 2.0. Basic Auth is deprecated/removed.
Quick outline (for Postman):
- Register an App in Microsoft Entra ID (your admin can do this).
- Add API permission Dynamics 365 Business Central -> user_impersonation and grant admin consent.
- Create a Client Secret.
- In Postman, use OAuth 2.0:
- Token URL:
https://login.microsoftonline.com/<tenantId>/oauth2/v2.0/token- Grant Type: Client Credentials (or Authorization Code if acting on behalf of a user)
- Scope (v2): https://api.businesscentral.dynamics.com/.default
- Use your Client ID and Client Secret.
- After you get the Bearer token, call:
GET https://api.businesscentral.dynamics.com/v2.0/<tenantId>/<environment>/api/companies- Copy the company id from the response.
- Call your custom API:
GET https://api.businesscentral.dynamics.com/v2.0/<tenantId>/<environment>/api/navplanet/tutorial/v1.0/companies(<companyId>)/customerLites?$top=5If you are on‑prem or using a gateway, URLs differ. Ask your admin for the base URL and auth method.
Package and Publish Your Extension (.app file)
- In VS Code, open the Command Palette -> AL: Package -> it creates an .app file in the .alpackages or project folder.
- To publish without debugging: Ctrl+Shift+P -> AL: Publish without debugging.
- Increase version in app.json when you make changes (example: 1.0.0.0 -> 1.0.0.1). BC requires version bump for re‑install.
Clean Error Handling (Copy Paste)
Add this helper procedure inside your codeunit for neater errors:
local procedure EnsureSuccess(Response: HttpResponseMessage)
begin
    if not Response.IsSuccessStatusCode() then
        error('HTTP %1 %2. Body: %3',
              Response.HttpStatusCode(),
              Response.ReasonPhrase(),
              GetBody(Response));
end;

local procedure GetBody(Response: HttpResponseMessage): Text
var
    T: Text;
begin
    Response.Content().ReadAs(T);
    exit(T);
end;
Then replace your checks with:
EnsureSuccess(Response);Common Mistakes (and Easy Fixes)
- Symbols not found / AL canot compile -> Run AL: Download Symbols again; confirm you are signed in to the correct sandbox.
- Publish blocked -> You might lack permissions. Ask admin for EXTENSION MANAGEMENT or D365 developer roles.
- Button not visible -> Make sure you are on the Customer List page and the action is in Processing group.
- API calls fail -> Check internet access from BC (SaaS), firewall, and TLS. The demo URLs must be reachable.
- Custom API returns 401/403 -> Your Postman token is missing/wrong scope, or the BC user/app lacks permission to the table/page.
- Custom API 404 -> Check APIPublisher/APIGroup/APIVersion/Entity names and the exact URL spelling.
- Re‑install fails -> Bump version in app.json.
Hope now you got better idea on How Business Central API Integration Works. Now try with actual API link you want to work for.
All the Best!


 + Free Mock Exam")