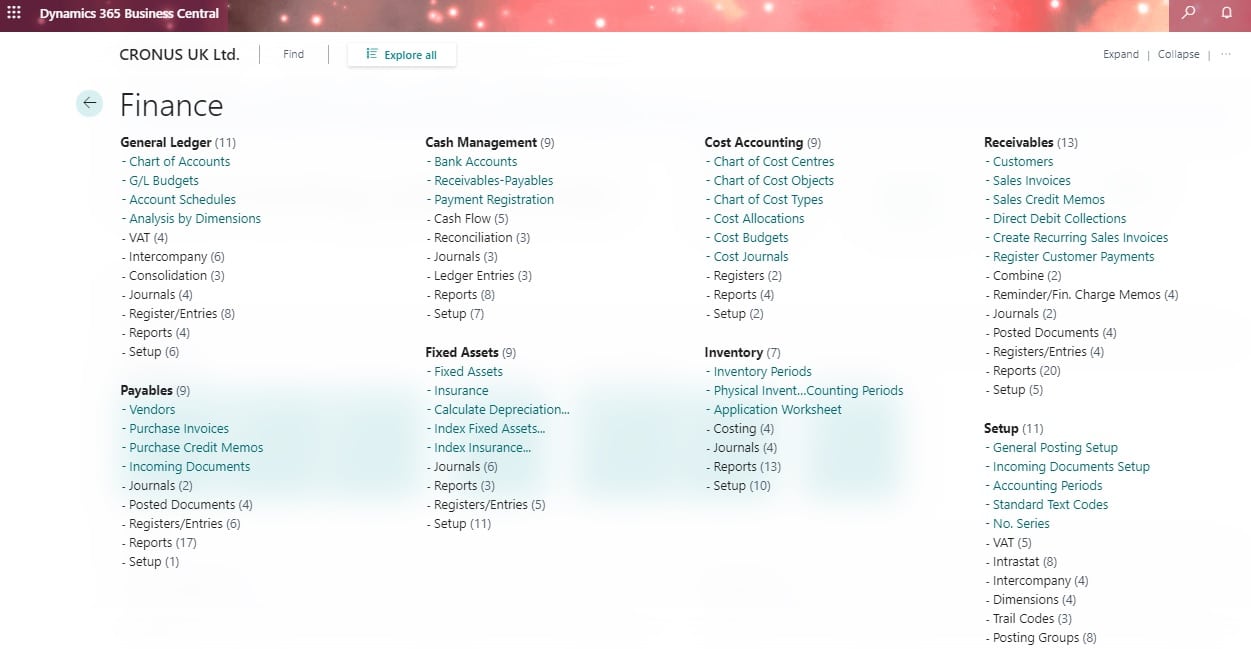
Following are the various methods available to post Cash / Vouchers inside the Microsoft Dynamics 365 NAV / Navision / Business Central ERP.
Table of Contents
CASH RECEIPT VOUCHER
In order to post a cash receipt vouchers go to,
FINANCIAL MANAGEMENT ->CASH MANAGEMENT->CASH RECEIPT VOUCHER.
- Posting date: Enter date of receiving
- Document Type: Press F6 and select accordingly.
- In case of advance given refunded, select REFUND. In case of sales, select INVOICE.
- Document No: Auto generated Or You Habe To Give.(If No. Series Is Selected Mannuel)
- Account type: G/L Account
- Account No: Press F6(For Drilldown) and select the Account
- Amt: Give value in -VE(-100) Figuers.
- Bal. Account type: G/L Account
- Bal. Account No: Press F6 and select the Balancing Account No.
- Cash flow Code: Press F6 and select the purpose for which the amount was used. This is used to take the CASH FLOW REPORT
- Empl Code: Press F6 and select the employee code.
- Dept. Code: Press F6 and select the department code, if required.
At the bottom of the page select NARRATION -> VOUCHER NARRATION
Type the narration and then press Escape. It will be auto saved. Now to post the transaction go to the bottom of the page select
POSTING (Button)->POST->YES
CASH PAYMENT VOUCHER
In order to post all cash payment vouchers go to,
FINANCIAL MANAGEMENT->CASH MANAGEMENT->CASH PAYMENT VOUCHER.
- Posting date: Enter date of payment
- Document Type: Press F6 and select PAYMENT
- Document No: Auto generated
- Account type: G/L Account . But if the payment is made to vendors, press F6 and select VENDOR.
- Account No: Press F6 and select the Account
- Amt: Give value in +VE(100) Figuers.
- Bal. Account type: G/L Account
- Bal. Account No: Press F6 and select CASH Account
- Cash flow Code: Press F6 and select the purpose for which the amount was used. This is used to take the CASH FLOW REPORT
- Empl Code: Press F6 and select the employee code.
- Dept. Code: Press F6 and select the department code, if required.
At the bottom of the page select NARRATION->VOUCHER NARRATION
Type the narration and then press Escape. It will be auto saved.
Now to post the transaction go to the bottom of the page select
POSTING (Button)->POST->YES
BANK PAYMENT VOUCHER
In order to post bank payments go to
FINANCIAL MANAGEMENT – > CASH MANAGEMENT-> BANK PAYMENT VOUCHER.
Now select the bank through which the transaction is made.
- Posting date: Enter date of transaction
- Document No: Auto generated
- Account type: Press F6 and select VENDOR
- Account No: Press F6 and select the VENDOR No.
- Amt: Give value in +VE(100) Figuers.
- Bal. Account type: Press F6 and select BANK A/C
- Bal. Account No: Press F6 and select the bank.
- Cash flow Code: Press F6 and select the purpose for which the amount was used. This is used to take the CASH FLOW REPORT
- Empl Code: Press F6 and select the employee code, if required
- Dept. Code: Press F6 and select the department code, if required.
- Cheque No: Type manually
- Cheque Date: Type manually
At the bottom of the page select NARRATION-> VOUCHER NARRATION
Type the narration and then press Escape. It will be auto saved.
Now to post the transaction go to the bottom of the page select
POSTING (Button)->POST->YES
Note:
If advance payment or unaccounted bill comes up, write the A/C No: or PO No: in the External Document No:
If the bill has already been accounted and payment not made, go to the field Applies – to doc No: in the lines and select the particular entry.
Go to the bottom of the page and select APPLICATION-> SET APPLIES TO ID -> (Click) OK.
BANK RECEIPT VOUCHER:
In order to post all bank receipts go to
FINANCIAL MANAGEMENT-> CASH MANAGEMENT ->BANK RECEIPT VOUCHER.
Now select the bank through which the transaction is made.
- Posting date: Enter date of transaction
- Document No: Auto generated
- Account type: Press F6 and select CUSTOMER
- Account No: Press F6 and select the CUSTOMER No.
- Amt: Give value in -VE(-100) Figuers.
- Bal. Account type: Press F6 and select BANK
- Bal. Account No: Press F6 and select the Bank No.
- Cash flow Code: Press F6 and select the purpose for which the amount was used. This is used to take the CASH FLOW REPORT
- Empl Code: Press F6 and select the employee code, if the payment was against an employee
- Dept. Code: Press F6 and select the department code, if required.
- Cheque No: Type manually
- Cheque Date: Type manually
At the bottom of the page select NARRATION-> VOUCHER NARRATION
Type the narration and then press Escape. It will be auto saved.
Now to post the transaction go to the bottom of the page
POSTING (Button)->POST->YES
Note:
If any advance received, write the A/C No: in the External Document No: field.
If the payment is received only after issuing the item, go to the field Applies – to doc No: in the lines and select the particular entry.
Go to the bottom of the page and select APPLICATION->SET APPLIES TO ID-> (Click) OK.