
Setting up Customer Posting Groups in Microsoft Dynamics 365 Business Central (BC) is one of the most important steps for getting your accounting right. If you do not set this up properly, customer transactions (like sales invoices or payments) may not go to the correct accounts in your books.
Don’t worry it’s easier than it sounds! Let’s go step by step in simple English over How to guide series.
Table of Contents
What Are Customer Posting Groups?
Think of Customer Posting Groups as a link between your customers and your accounting system.
- They tell BC which General Ledger (G/L) accounts to use when customers buy something, get discounts, or pay invoices.
- Example: Domestic customers may post to one set of accounts, while International customers post to another.
This saves time and avoids mistakes because you don’t need to select accounts manually every time.
Steps to Setup Customer Posting Groups in BC
Open Posting Groups Page
In BC, go to Search (Tell Me ) and type Customer Posting Groups.
Tip: You may try Business Central Keyboard shortcuts for faster navigation.
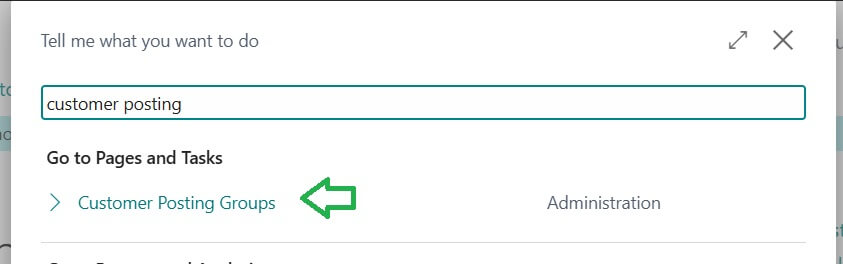
Click the page to open.
Create a New Customer Posting Group
Click New.
All fields where * shows mandatory fields in Business Central.
Give your group a Code (example: DOMESTIC, EXPORT, RETAIL).
Add a short Description (example: “Local Customers – India”).
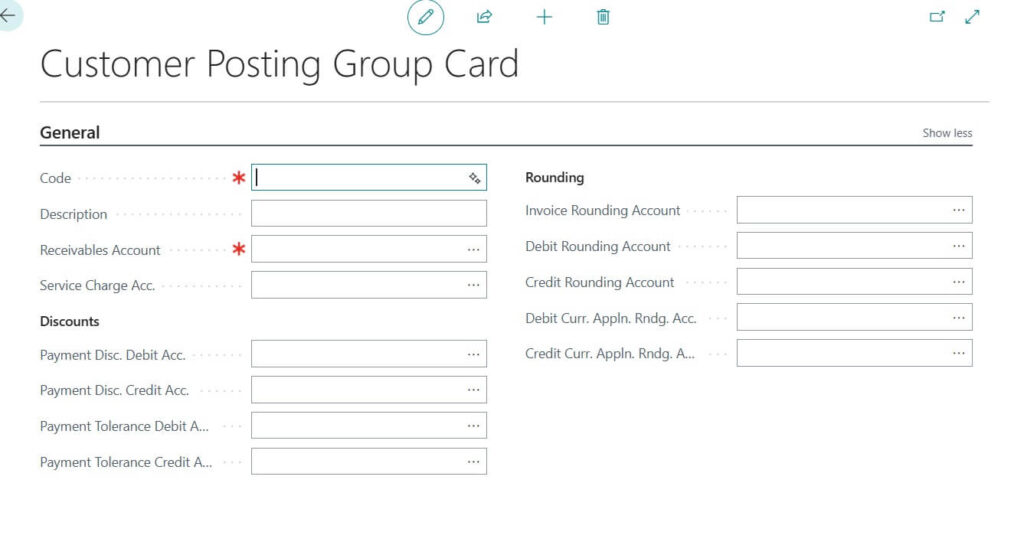
Define G/L Accounts
Here is where the magic happens you connect customers to accounts:
- Receivables Account (Mandatory): The account where customer balances will sit.
- Service Charge Account : For late fees or service charges.
- Payment Disc. Debit Acc. : Defines the G/L account for posting payment discounts given to customers in this group.
- Payment Disc. Credit Acc.: Sets the G/L account for reduced payment discounts to customers in this group.
- Payment Tolerance Debit Acc. : Defines the G/L account for posting payment tolerance and sales payments for this business and product group combination.
- Payment Tolerance Credit Acc. : Specifies the G/L account for posting payment tolerance and sales payments for this business–product group combination.
- Payment Tolerance Account (optional) -> For rounding differences.
- Invoice Rounding Account: Specifies the G/L account for posting invoice rounding differences in customer transactions.
- Debit Rounding Account : Specifies the G/L account for posting rounding differences on remaining amounts.
- Credit Rounding Account : Specifies the G/L account for rounding differences on remaining amounts.
- Debit Curr. Appln. Rndg. Acc. : G/L account for rounding differences in currency applications.
- Credit Curr. Appln. Rndg. Acc. : G/L account for currency rounding differences
Customer Posting group Account Type Filters Standard
| Account type in Customer Posting Group | Filters Applied |
|---|---|
| Receivables Account | Account category = Assets Account type = Posting Account Subcategory Entry No. = 4 |
| Service Charge Account | Account category = Income Account type = Posting Account Subcategory Entry No. = 19 |
| Payment Disc. Debit Acc. Payment Disc. Credit Acc. Payment Tolerance Debit Acc. Payment Tolerance Credit Acc. | Account category = Expense Account type = Posting Account Subcategory Entry No. = 31|32|33|34|35|36|37|38|39|40|41|42|43|44|45|46 |
| Invoice Rounding Account Debit Rounding Account Credit Rounding Account Debit Curr. Appln. Rndg. Acc. Credit Curr. Appln. Rndg. Acc. | Account category = Income Account type = Posting Account Subcategory Entry No. = 18|19|20|21|22|23|24|25 |
Tip: For showing all G/L Accounts while selecting on setup choose “View All Accounts on lookup”=TRUE option available in Customer Posting groups page.
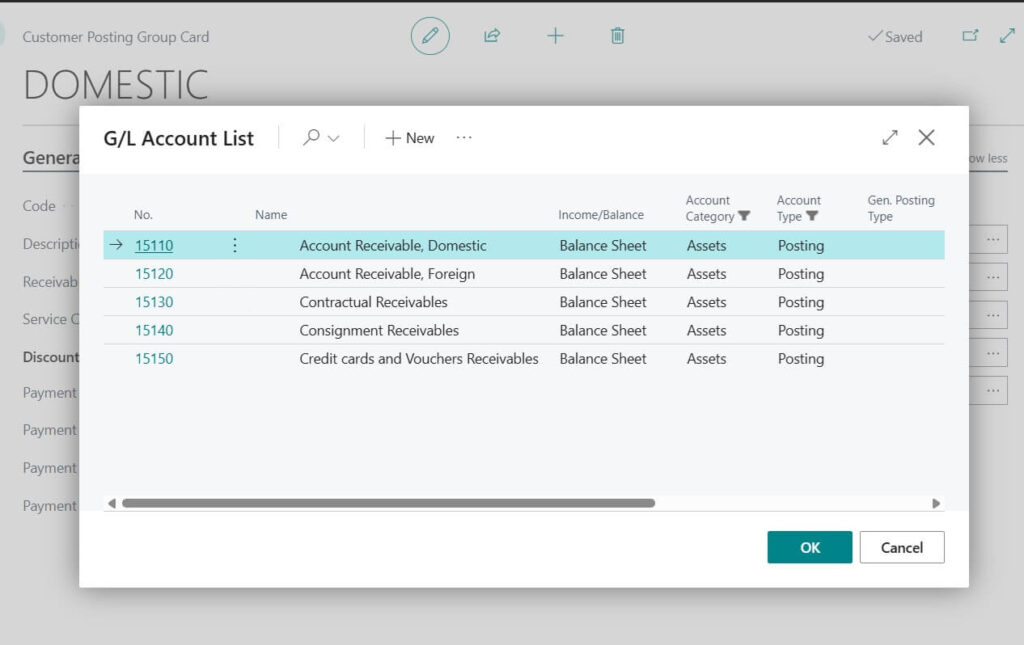

Example:
DOMESTIC group -> Receivables Account: 15110 (Domestic Debtors)
EXPORT group -> Receivables Account: 15120 (Foreign Debtors)

Assign Posting Groups to Customers
Open the Customer Card.
Find the field Customer Posting Group.
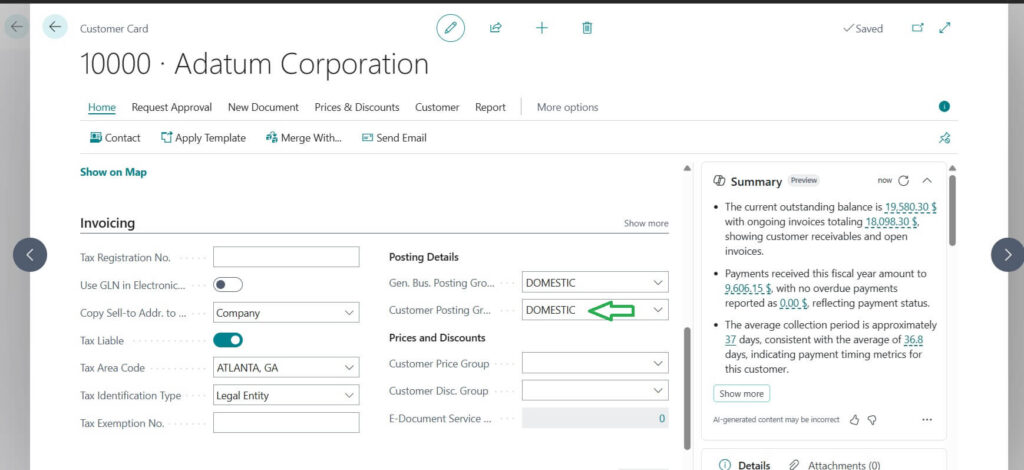
Choose the right group (DOMESTIC, EXPORT, etc.).
From now on, every transaction for that customer will follow the rules you set.
Sample result after assigning the “DOMESTIC” customer posting group is as follows

Best Practices for Customer Posting Groups
- Keep it simple – Don’t create too many groups unless needed.
- Name groups clearly – Use easy codes like DOMESTIC, EXPORT, ONLINE.
- Match with business model – If you sell to both local and foreign customers, have separate groups.
- Test with sample invoice – Always post a test invoice to check if entries go to the right accounts.
Why This Matters
By setting up customer posting groups:
- Your sales and payments will always hit the right accounts.
- Your financial reports will be cleaner.
- You’ll save time during audits and monthly closing.
It’s a small setup task with a big impact on your business accounting.
Final Tip: Once you get comfortable, you can also explore Vendor Posting Groups (for suppliers) and General Business Posting Groups (for tax handling). Together, they give you a powerful and automated posting system in Business Central.
FAQ: Customer Posting Groups in Business Central
A Customer Posting Group is a setup that tells Business Central which General Ledger (G/L) accounts to use when posting customer transactions like invoices, credit memos, and payments.
They make sure all your customer transactions are posted to the correct accounts automatically. This saves time, reduces mistakes, and keeps your reports accurate.
Customer Posting Group -> Connects customers to G/L accounts for accounting.
Customer Price Group -> Connects customers to pricing rules for sales.
Posting = Accounts, Pricing = Discounts and Sales Prices.
No. A customer can only have one Customer Posting Group at a time. But you can change it later if needed.
Not always. Usually, you create posting groups by category for example:
> DOMESTIC customers
> EXPORT customers
> ONLINE customers
This way, many customers can share the same posting group.
If you don’t set them up, BC won’t know which G/L accounts to use. This can cause posting errors or wrong entries in your accounts.
Yes, you can edit or switch a customer’s posting group. But be careful changing it will only affect new transactions, not old ones.
Stay tuned to NavisionPlanet for more simple, step-by-step functional guides / Sales Module on Business Central.
